Getting Started
This chapter walks you through installing Coherence Audio, launching it for the first time, setting up your recording devices, and completing your first multi-track recording session.
System Requirements
| Requirement | Minimum |
|---|---|
| Operating System | Windows 11 |
| Architecture | x64 or ARM64 — native binaries for both, no emulation |
| RAM | 16 GB minimum |
| Storage | Sufficient space for the application plus audio data (see Estimating File Sizes) |
| USB | One available USB port per microphone; separate USB host controllers recommended for best performance when using many devices simultaneously |
| Audio Devices | Any WASAPI-compatible USB audio device (microphone, USB audio interface, webcam with audio) |
ARM64 note: Coherence Audio ships native ARM64 binaries. If you are running Windows on ARM (e.g., Snapdragon X Elite, Apple Silicon via Parallels), you will get full native performance.
Installing Coherence Audio
From the Microsoft Store (Recommended)
- Open the Microsoft Store on your PC.
- Search for Coherence Audio, or visit the direct link: Microsoft Store listing.
- Click Get (the base app is free).
- Once installed, click Open or launch it from the Start menu.
Upgrading to Pro
The Coherence Audio Pro add-on unlocks automatic clock-drift correction — the feature that automatically compensates for timing differences between your USB microphones over long recordings.
To upgrade:
- Launch Coherence Audio.
- Look for the Upgrade to Pro prompt in the application, or visit the Pro add-on page directly from the Microsoft Store.
- The Pro upgrade is a one-time, non-expiring purchase — no subscription.
First Launch
When you open Coherence Audio for the first time, you will see the main window. Any audio input devices detected on your system are automatically added as tracks, each armed and ready to record.
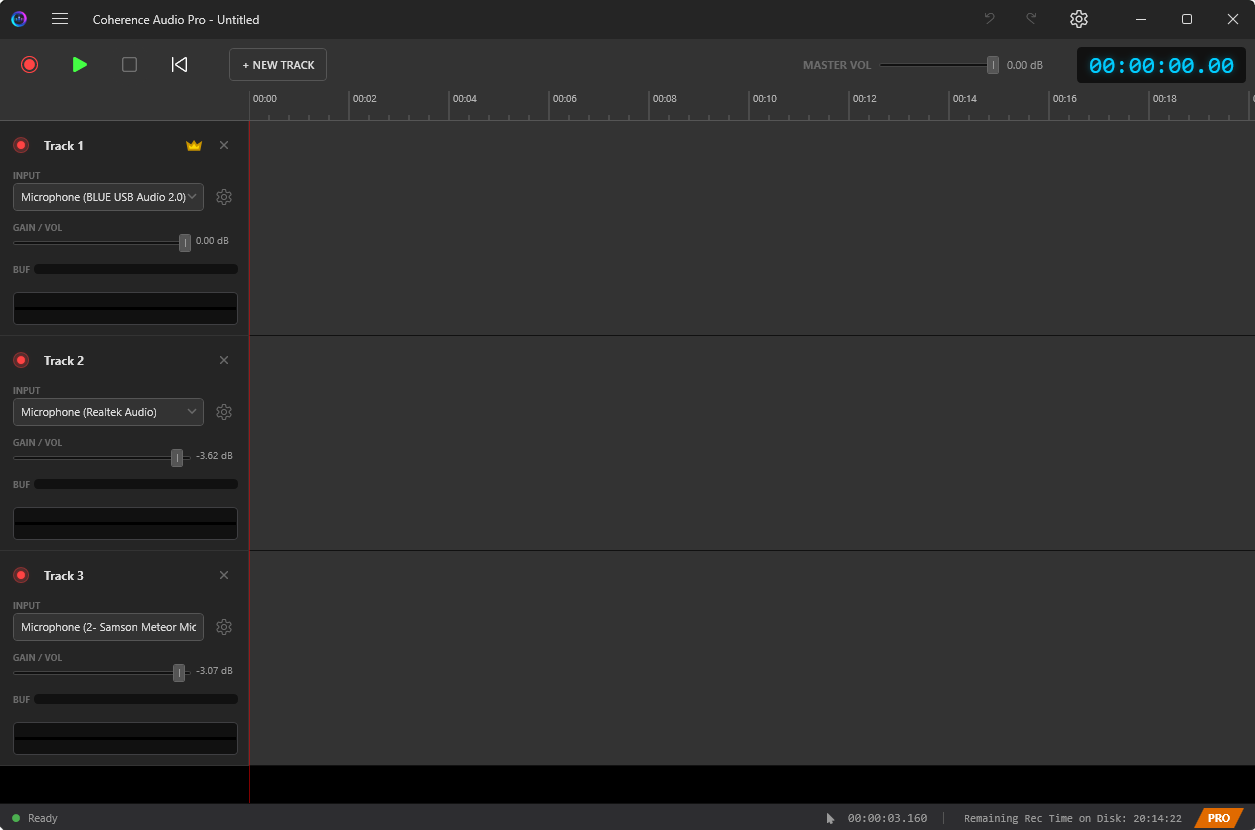
The main window is divided into three areas:
- Toolbar (top) — Record, Play/Pause, Stop, and project controls.
- Track list (left column) — One row per device. Shows the device name, arm state, VU meters, and per-track controls.
- Timeline (right panel) — Displays waveform clips as they are recorded, and shows your editing workspace after recording.
How Coherence Audio Stores Your Project
Understanding the project model avoids surprises.
The .coh Project File
A Coherence Audio project is saved as a single .coh file. It stores everything in one place:
- The session manifest (track names, clip positions, device assignments, settings).
- All recorded audio data (embedded in the database after you save).
When you first create a new project and start recording — before you have saved — Coherence Audio writes audio to a temporary workspace folder (by default under %TEMP%). As soon as you do File → Save As, all the audio data is imported into the .coh file and the temporary folder is cleaned up.
Bottom line: The
.cohfile is self-contained. To share, back up, or move a project, copy a single file.
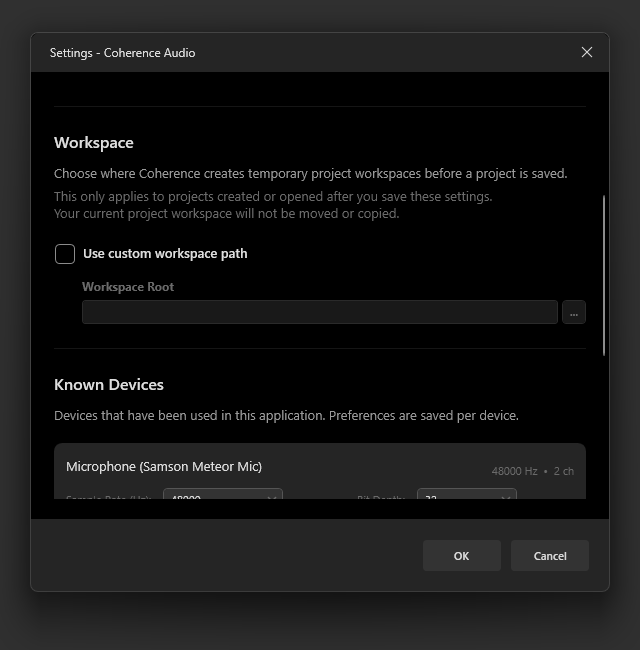
The Workspace Folder (Temporary Storage Root)
While working, Coherence Audio needs a place for the active audio data. This is the workspace root — the directory where temporary session folders are created. You can change this to a fast dedicated SSD in Settings → Workspace Path.
Tip: Point the workspace root at a fast local SSD. Multi-device recording generates simultaneous write streams; slow storage can cause buffer overruns and audio drop-outs. Network drives and slow USB HDDs are not suitable.
Exporting to WAV
Coherence Audio does not produce .wav files automatically during recording. To get .wav files for use in another DAW, use File → Export → Audacity LOF — see Export for details.
Adding and Configuring Devices
When you launch Coherence Audio, all detected WASAPI audio input devices are automatically added as tracks. You can add more manually at any time.
Adding a Track Manually
Click the Add Track (+) button in the toolbar or track panel. Select a device from the list and confirm. A new track row appears in the track list.
Per-Track Settings
Click the Settings icon on the track row (or go to Settings → Known Devices) to configure each device. At a minimum, verify:
- Sample Rate — Set to the device’s native rate (44.1 kHz or 48 kHz for most USB mics; do not ask the device to resample internally).
- Bit Depth — 32-bit float is the default and provides the widest capture headroom. 24-bit PCM is fine for most studio work.
- Input Gain — This controls the Windows audio endpoint volume for the device. Adjust so the VU meter shows healthy levels without clipping. See Recording for guidance.
See Settings Reference for a full description of all per-device options.
Your First Recording
Step-by-Step
-
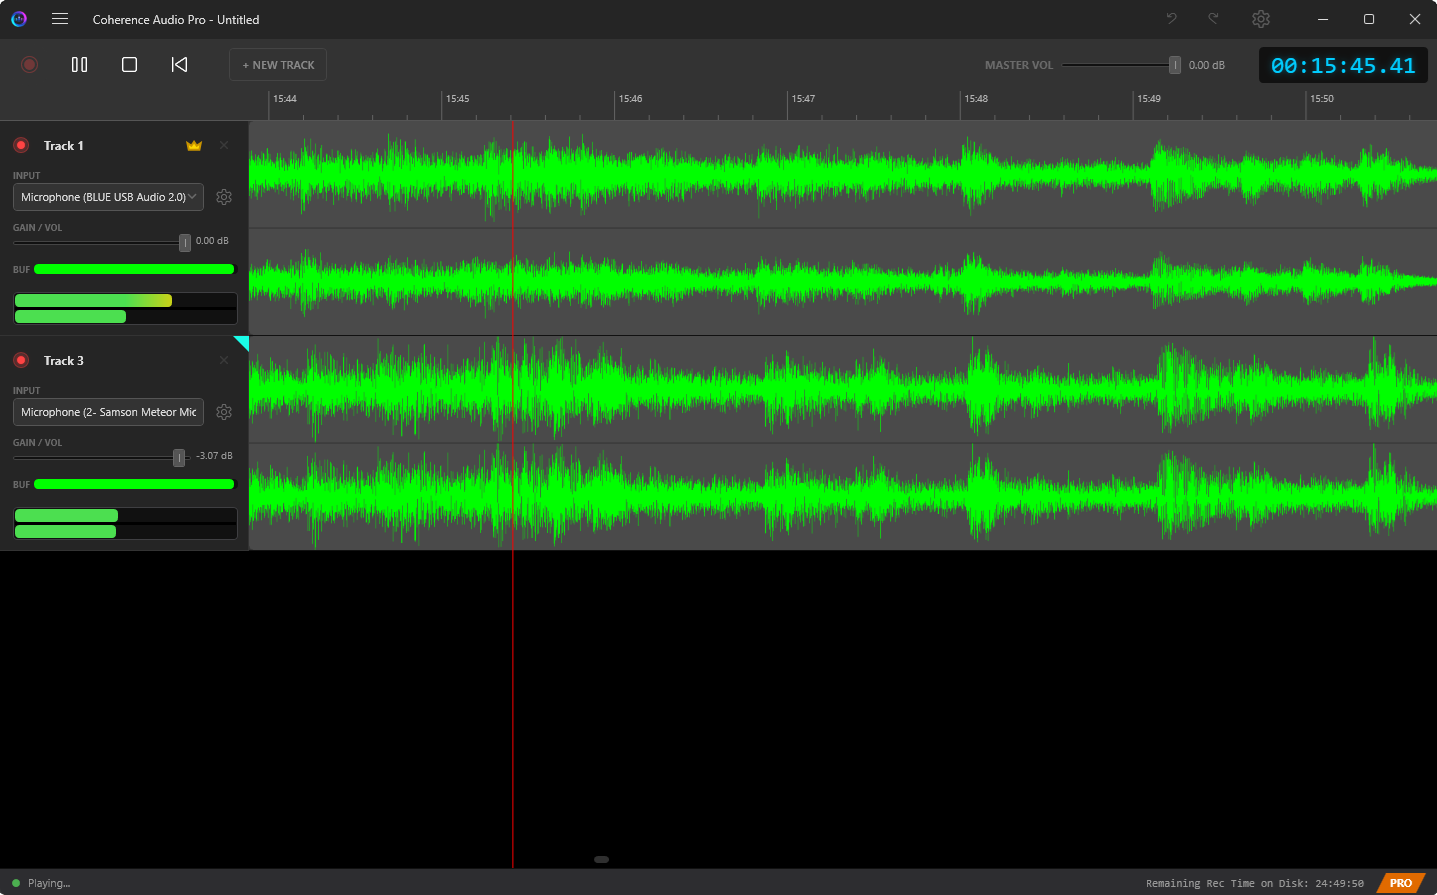
Confirm tracks are armed. Each track shows an arm checkbox. Auto-populated tracks are already armed. Click the checkbox to arm or disarm any track — only armed tracks capture audio.
-
Check the VU meters. Make some sound at each microphone. Confirm all VU meters are moving and that the clip indicator does not light up (see Recording for details).
-
Click Record. All armed tracks begin capturing simultaneously. The waveform on each track grows in real time as audio is recorded.
-
Click Stop when you are done.
-
Save your project. Use File → Save As (
Ctrl+Shift+S) to choose a location and write the.cohproject file. All audio captured so far is embedded into this file.
Tip: Save your project before closing the application so your recordings are not lost when the temporary workspace is cleaned up.
Estimating File Sizes
Use this table to estimate storage requirements before a session:
| Format | 1 track × 1 hour |
|---|---|
| 16-bit PCM, 44.1 kHz, mono | ≈ 302 MB |
| 24-bit PCM, 48 kHz, mono | ≈ 494 MB |
| 24-bit PCM, 48 kHz, stereo | ≈ 988 MB |
| 32-bit Float, 48 kHz, mono | ≈ 658 MB |
| 32-bit Float, 96 kHz, mono | ≈ 1.38 GB |
Multiply by the number of tracks in your session. For a 4-person podcast at 32-bit Float / 48 kHz mono, budget approximately 2.6 GB per hour of recording.
All this data is embedded in the .coh project file when you save.
Reopening a Session
- File → Open (or pick from File → Recent Projects), select the
.cohfile. - Coherence Audio loads the session layout and re-links any devices that are currently connected.
- If a device is no longer connected, the track’s device selector will show no selection. Plug the device back in and use Devices → Rescan Input Devices to re-link it.
Next Steps
- Recording — Deeper coverage of recording options, monitoring, and how Coherence handles hardware problems.
- Clock Sync & Drift Correction — Essential reading if you are using multiple USB microphones and need them to stay in sync over long sessions.
- Settings Reference — Full description of every configurable option.